Introduction
After literal years of trying to find a solution that combines notions ability to handle data and logseqs ability to handle graphs I think I’ve finally found a solution. Obsidian.
Setting Up Obsidian
Step 1: Download and Install
Start by downloading and installing Obsidian.
Step 2: Organizing Your Notes
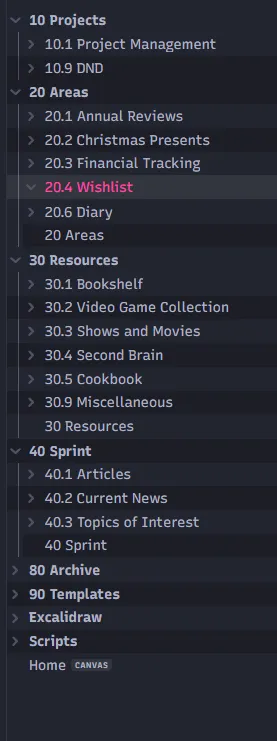
Decide on an organizational system for your notes. I use a modified version of the Johnny.Decimal System combined with the PARA system:
- Projects: Active projects with tasks and related materials.
- Areas: Ongoing areas of responsibility that aren’t projects.
- Resources: Reference materials you might need later.
- Sprint: Weekly sprint planning and task management.

Why Obsidian
I choose Obsidian because it allows you to control your data while providing database-like power through plugins and customization. After trying other tools like Notion, Logseq, Capacities, and Evernote, I found Obsidian to be the best. As you can always use the markdown as a basis and integrate it with powerful plugins. Your data is always yours, and you can always export it.
Key Advantages
- Data Ownership: Your notes are stored locally in Markdown format.
- Customizability: Obsidian can be tailored to fit your specific needs.
- Developer-Friendly: Directly modify and script your workflow.
But for the obsidian to work like I wanted it to, some things had to change.
Plugins:
I tried to keep the list as small as possible and only include plugins I cannot live without, and I excluded the ones which are included with obsidian. This is community plugins only.
Dataview
Dataview is plugin that allows you to query your notes, and it’s the most powerful plugin I have ever used. It’s like having a database in your notes. I use it to query my notes, and to create a CMS like system. And since you can use DataviewJs you can basically do anything:
This is an example where I can figure out how often I mentioned each person throught the year in my diary.
const folder = "20 Areas/20.6 Diary/2024"; // Replace with your folder pathconst pages = dv.pages(`"${folder}"`);const linkCounts = {};
// Count unique links per pagefor (const page of pages) {  const uniqueLinks = new Set(page.file.outlinks.map((link) => link.path)); // Collect unique links in the current page  uniqueLinks.forEach((linkPath) => {    linkCounts[linkPath] = (linkCounts[linkPath] || 0) + 1;  });}
// Convert to an array, sort by frequency, and take the top 3const sortedLinks = Object.entries(linkCounts)  .sort((a, b) => b[1] - a[1])  .slice(0, 5);
// Display as a tabledv.table(["Person Mentioned", "Amount of Times Mentioned"], sortedLinks);
Diary - Data mangement
On that note, one thing I found that was very important was the mindshift, into linking (tagging) everything whenever possible. If you have anything that should be linked, link it to a date. If you do it long enough you will end up with a graph of your life, and you can see how things are connected, and how/why/when you did what you did.

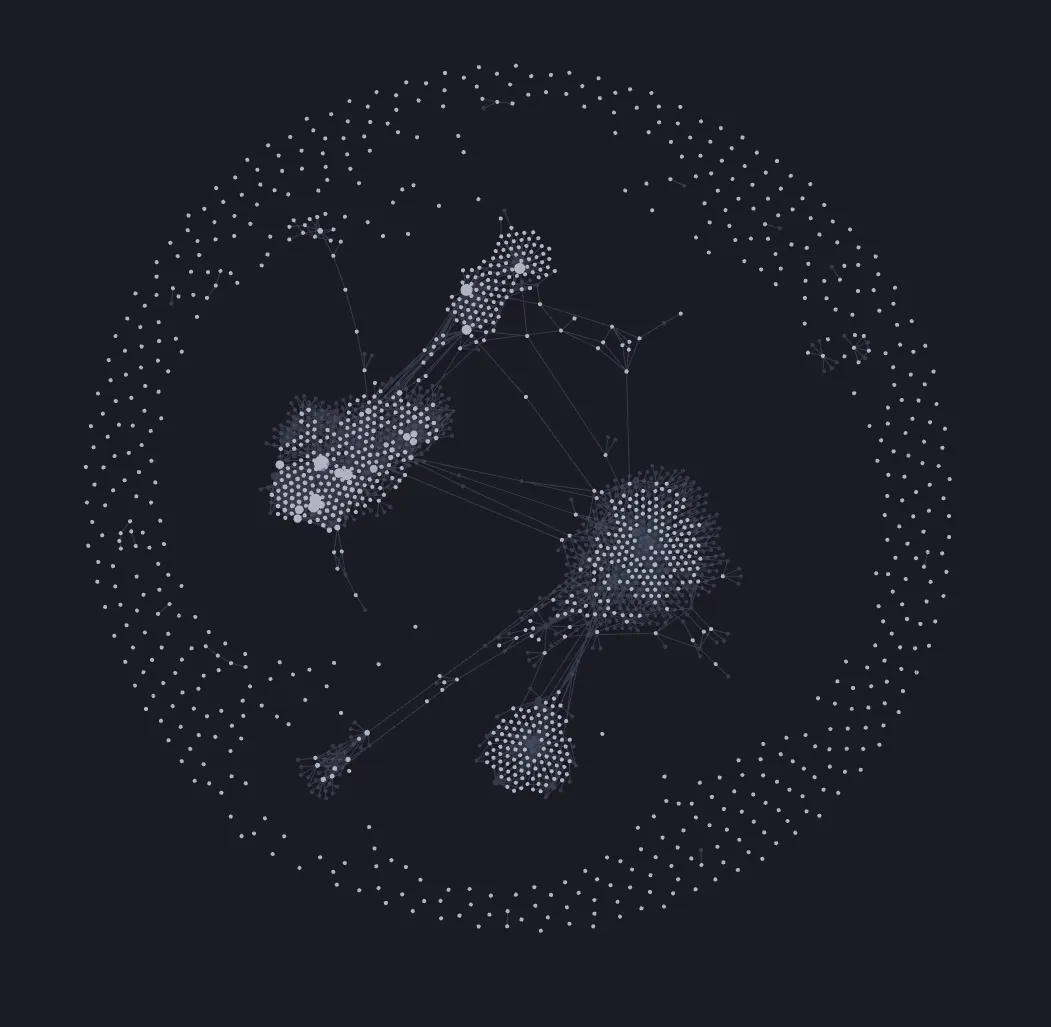
Right now I have migrated not even 1/10th of my notion to obsidian, and it already looks like this. I can’t wait to see how it will look like at the end.
QuickAdd
Now to the meat of the subject, why I like obsidian so much, the QuickAdd plugin. QuickAdd enhances note creation with templates and scripts. For instance, you can use it to create a new note (e.g., for a movie) and autofill its properties:

So scripts is the part where it clicked for me, how powerful this plugin really is. I wanted to create a new file (movie/show) and then autofill it’s properties. As is shown in this video.
For more details, check the documentation
Templates
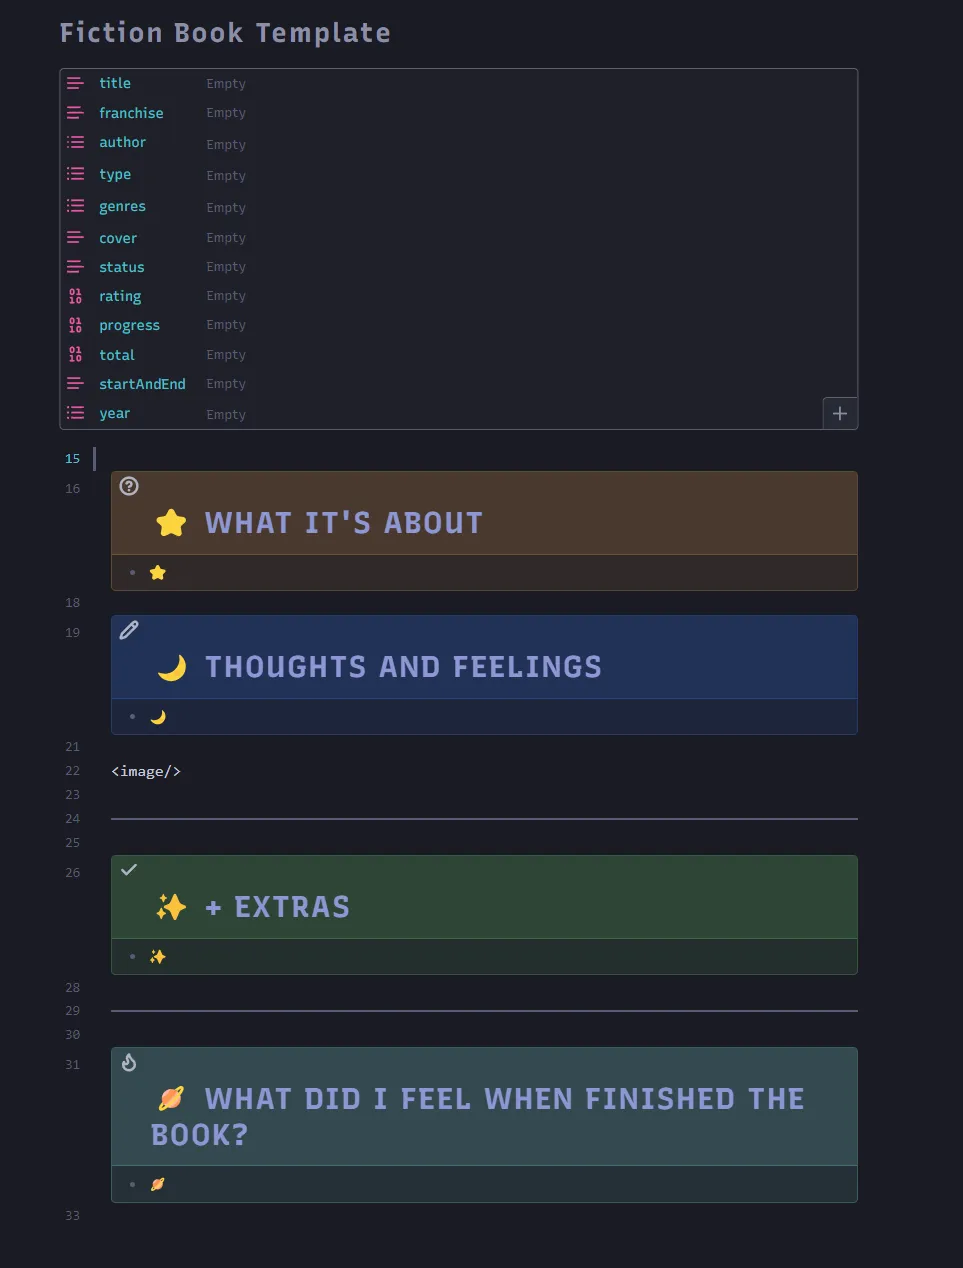
But I modified the tempalte a bit.
---title: "{{VALUE:Title}}"franchise:type: { { VALUE:typeLink } }genres: { { VALUE:genreLinks } }cover:status:rating:progress:total:episodeLen:watchedDate:year:---
> [!question] # ⭐️ WHAT IT'S ABOUT>> - ⭐️ {{VALUE:Plot}}
> [!note] # 🌙 THOUGHTS AND FEELINGS>> - 🌙
<image/>{{VALUE:Poster}}
---
> [!done] # ✨️ + EXTRAS>> - ✨️
---
> [!tip] # 🪐 WHAT DID I FEEL WHEN FINISHED THE MOVIE/SHOW?>> - 🪐
And as you can see, there is a random {{VALUE:Poster}} in there, which is a link to a cover image. But I need that image saved in the same folder as the note, so I created a script for that.
Scripts
// Function to extract all links from file contentasync function getLinksFromContent(content) {  const urlRegex = /(https?:\/\/[^\s]+)/g;  const matches = [...content.matchAll(urlRegex)];  return matches.map((match) => match[0]); // Return an array of links}
// Function to fetch media and verify it's an imageasync function fetchMedia(url) {  try {    const response = await fetch(url);    if (!response.ok) {      console.error(`Failed to fetch URL: ${url}`);      return null;    }
    // Check if the content is an image    const contentType = response.headers.get("Content-Type");    if (!contentType || !contentType.startsWith("image/")) {      console.error(`URL is not an image: ${url}`);      return null;    }
    // Get the image as a Blob    const blob = await response.blob();    const arrayBuffer = await blob.arrayBuffer();    const uint8Array = new Uint8Array(arrayBuffer);
    return { uint8Array, contentType };  } catch (error) {    console.error(`Error fetching media from URL: ${url}`, error);    return null;  }}async function writeMediaToDisk(app, activeFile, links) {  // Determine the parent directory of the active file  const activeFilePath = activeFile.path;  const parentDir = activeFilePath.substring(    0,    activeFilePath.lastIndexOf("/"),  );  const attachmentsPath = `${parentDir}/attachments`;
  // Ensure the attachments folder exists  let folder = app.vault.getAbstractFileByPath(attachmentsPath);  if (!folder) {    await app.vault.createFolder(attachmentsPath);  }
  let content = await app.vault.read(activeFile);
  for (const url of links) {    const media = await fetchMedia(url);    if (!media) continue;
    // Generate a unique file name    const ext = media.contentType.split("/")[1];    const fileName = `${Date.now()}.${ext}`;    const fullPath = `${attachmentsPath}/${fileName}`;
    // Use Vault.create to write the image to the disk    try {      await app.vault.createBinary(fullPath, media.uint8Array);    } catch (error) {      console.error(`Error creating file at ${fullPath}:`, error);      continue;    }
    // Replace the URL in the content with a local link    const localLink = `![[${fullPath}]]`;    content = content.replace(url, localLink);
    content = content.replace("\ncover:", "\ncover: " + `${fileName}`);  }
  // Update the active file with modified content  await app.vault.modify(activeFile, content);  new Notice("All images downloaded and linked successfully.");}
async function processLinks(app) {  const activeFile = app.workspace.getActiveFile();  if (!activeFile) {    new Notice("No active file is currently open.");    return;  }
  const content = await app.vault.read(activeFile);  const links = await getLinksFromContent(content);
  if (links.length === 0) {    new Notice("No links found in the file.");    return;  }
  await writeMediaToDisk(app, activeFile, links);}
module.exports = {  entry: start,  settings: {    name: "Link to Image",    author: "Maximilian Mauroner",  },};
async function start(params) {  const app = params.app;  await processLinks(app);}
This script basically fetches any link, tries to download them (if it’s an image) and then saves it in the attachments folder. Then it replaces the text of the link and adds the filename in the page properties
Why Obsidian is Ideal for Developers
Obsidian’s flexibility allows developers to:
- Automate workflows with scripts.
- Customize UI with CSS.
And that is why I choose obsidian as my CMS.
Shmmering Focus
Finally, the Shimmering Focus theme deserves a special mention. It’s the most polished and useful theme I’ve used. You can tweak it with the Style Settings plugin to make it your own.


